Converting a Race Boat into a pleasure Boat

Why did you decide to go with oak instead of something like carbon fiber rod or a kevlar/carbon weave fillet???
 
Why did you decide to go with oak instead of something like carbon fiber rod or a kevlar/carbon weave fillet???

I wanted to run pcv piping so I could run a couple switch up top, but I was told that 1 1/2 pc. of oak would add a tremendous amount of strength, so that's the route I went.

_______________________________________________

This weekend..

After I pulled the radius around the parts I still wanted to sand them smooth, I found this round grinding wheel that fit great and did a perfect job!!

Remove - 192.jpg


I than began to attach the rear lib lip with some 1708 cloth. I first cut the four corners
Remove - 193.jpg

I than cut the sides and finished with the front and back. I made sure to over lap each
piece of 1708 to help insure strength.

Remove - 194.jpg
Remove - 195.jpg
Remove - 196.jpg


I also attached 1708 to the front pillar area, but ran out of cloth ... (dran FedEx)
Remove - 197.jpg
 
Last edited:
All right.....

Two weeks with nothing??????:toetap05:

Just lots of sanding, grinding and fitting.. nothing really interesting to take pictures of yet.
I'll be ready to attach the canopy soon.. should make for some good chat.
 
I did start another project and once again this is pushed back to once a week of work.


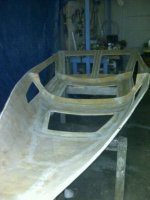
All the 1708 was cut to wrap the inside frame.
The frame is made from 3/4 marine plywood and
the square edges are rounded.
Remove - 300.jpg

Remove - 301.jpg

I found it better to number each piece of cloth
and lay it out on a sheet of cardboard, then wet it out.
Take the next piece and lay it on top and wet that out..
seems to work well and has little material waste.
Remove - 302.jpg

Remove - 303.jpg

Remove - 304.jpg


Part is finish sanded, and I started running the lines inside.
Figure I'll do the big stuff now so I'm not crawling inside and
out threw a canopy hatch.
Remove - 305.jpg
 
Well I'm back at it ... I went threw and inventoried all my parts. After sitting around the shop for the past year with me no were to be seen
I'm only missing 1 volt gauge ... I can accept that.

Remove - 207.jpg
 
I gave the floor a quick sanding with 80 grit to remove all the bad stops. I really dont think its worth the time to make it look like new.. even when this boat was new it
didnt look perfect - HELL, ITS A RACE BOAT.

I than rolled on the first coat..

Remove - 208.jpgRemove - 209.jpg
 
After the floor coat was rolled on and dried I placed the seats into there spot.. I also cut the dash and mounted the helm and ran the hyd.lines to the front.

Remove - 210.jpgRemove - 213.jpg
 
Next was to figure out my dash lay-out. I have much less room than before and much less than a normal dash..
I needed to watch were the gauges went as I have back braces behind the dash glassing everything together.
(now I realize I really "over built" parts of this project)

Remove - 215.jpg
 
Drilled and finished.. Once this was done I wet out the inside of the holes with resin so I dont have any exposed wood.

Also, not sure if you can tell but the dash is 3/4 thick.. once again, WAY OVER-BUILT.

Remove - 214.jpgRemove - 215.jpgRemove - 216.jpgRemove - 217.jpgRemove - 218.jpg
 
The idea is to rig as much as possible before we attach the canopy - this will (should)
make it a little easier so I'm not crawling in and out the hatch..
Remove - 221.jpgRemove - 222.jpg
 
I forgot to cut the fuse panel...

Always make sure to paint any exposed wood with resin to ensure the water stays out..

Remove - 226.jpg

Remove - 227.jpg
 
After everything was mounted I was reminded that I did not need teathers in a
canopied boat..

This worked out great as my pig-tails were not long enough to run to were I wanted to
put the ignition keys.


Remove - 228.jpg

Remove - 229.jpg

I simple removed the teathers, cut the hole into a square..

Remove - 230.jpg

Made a aluminum backer plate

Remove - 231.jpg

and done..
 
This large looking metal I-beam is actually pretty light.

It will be mounted and used as a step to climb in and out
along as the mounting point for our 5pt straps.

Remove - 232.jpg
 
*Safety time: NEVER WEAR GLOVES WHILE DRILLING.

The bit broke and than the drill and little part of bit left in the chuck slide across the part, than the broke small part in the drill snagged my glove and drove the broken drill bit threw my finger.

Remove - 233 - Finger.jpg
 
Back
Top