The Re-Birth of a Scout

After completing that task I started to utilize after work hours on the weekdays. The first stringer was cut out. Yes I did find more damage from the mites. At this point I didnt care to take to many pics of the distruction. I was over it and was moving on! I started to think more of the fun times to come...
 

Attachments

  • Kevin&John-Keshonong 003.jpg
    Kevin&John-Keshonong 003.jpg
    111.6 KB · Views: 21
  • Kevin&John-Keshonong 004.jpg
    Kevin&John-Keshonong 004.jpg
    96.8 KB · Views: 22
  • Kevin&John-Keshonong 005.jpg
    Kevin&John-Keshonong 005.jpg
    93 KB · Views: 19
All the voids in the wood was from the mites......
 

Attachments

  • Kevin&John-Keshonong 013.jpg
    Kevin&John-Keshonong 013.jpg
    82.4 KB · Views: 19
  • Kevin&John-Keshonong 012.jpg
    Kevin&John-Keshonong 012.jpg
    83.6 KB · Views: 24
  • Kevin&John-Keshonong 011.jpg
    Kevin&John-Keshonong 011.jpg
    91.9 KB · Views: 34
Now to the month of September.... The stringer was cut out and alot of grinding needed to be done to make way for the new stringer. Talk about alot of dust!! I found the grinder with the flap disk to do the job the best. I didnt take pics of making the stinger but I bonded together 1/2" thick marine plywood. To get the length and keep the strenght I staggered the joints. To bond together I used the 1300 biax that Dave suggested. Oh yea, I never said but, I did go the epoxy route. I sourced it from US Composites..
 

Attachments

  • Johnson Creek 9-3-2009 001.jpg
    Johnson Creek 9-3-2009 001.jpg
    81 KB · Views: 19
  • Johnson Creek 9-3-2009 003.jpg
    Johnson Creek 9-3-2009 003.jpg
    88.5 KB · Views: 21
  • Johnson Creek 9-3-2009 004.jpg
    Johnson Creek 9-3-2009 004.jpg
    92.2 KB · Views: 23
I thought fitting in the stinger would be a breeze. Boy, was I mistaken. This took about a week using after work hours. For this stringer I only used a belt sander. I quickly wisened up after that and bought a planer. That did save alot of time. But remeber, once the wood is taken away, there is no way of adding it back.... "Measure once and cut twice.... or something like that" :)
 

Attachments

  • Johnson Creek 9-3-2009 008.jpg
    Johnson Creek 9-3-2009 008.jpg
    67 KB · Views: 23
  • Johnson Creek 9-3-2009 007.jpg
    Johnson Creek 9-3-2009 007.jpg
    87.9 KB · Views: 18
  • Johnson Creek 9-3-2009 006.jpg
    Johnson Creek 9-3-2009 006.jpg
    87.9 KB · Views: 29
a few more.....
 

Attachments

  • Johnson Creek 9-3-2009 009.jpg
    Johnson Creek 9-3-2009 009.jpg
    97.7 KB · Views: 17
  • Johnson Creek 9-3-2009 010.jpg
    Johnson Creek 9-3-2009 010.jpg
    74.7 KB · Views: 21
  • Johnson Creek 9-3-2009 011.jpg
    Johnson Creek 9-3-2009 011.jpg
    84.4 KB · Views: 16
---- 2 Be Continued ----

I also cant forget to thank one of my best friend Larzs.... If there is anything in life he taught me is, You can do anything if you put your mind to it!! Thanks bro!!
 

Attachments

  • JohnsonCreek 7-13-2008 060.jpg
    JohnsonCreek 7-13-2008 060.jpg
    68.4 KB · Views: 25
  • Milwaukee 10-27-2007 006.jpg
    Milwaukee 10-27-2007 006.jpg
    130.6 KB · Views: 57
Last edited:
Man Bonz, I feel for you. That's an azzload of work that your doing....but think of the satisfaction when you're done. You should be proud!!!!
Talk about "making it your own"...WOW!!!

Cheers to you!
Craig
 
Thanks for the kind words guys. I will start posting again on the project this weekend. I have to give a shout out to my bud ItsPeanut. He helped out tremendously a few weeks back. In fact, for my birthday present we along with Ang got the outer two stringers installed. Now thats progress!!! Now that the holiday break is over and I am back in WI, the work starts up again..... :)
 
Alright Nut, pack to posting some pics... From where I left off above. The stringer was fitted and ready to be glassed in. Unfortunately I left the camera at home a few weekends and did not take any pics. Ang and I got it glassed and and I made a template for the starboard stringer. I cut the boards out and my Pops came up to help bond them together. We had a good time! He was happy to see the progress in person.
 

Attachments

  • 10-10-2009 OHIO 002.jpg
    10-10-2009 OHIO 002.jpg
    91.5 KB · Views: 42
  • 10-10-2009 OHIO 015.jpg
    10-10-2009 OHIO 015.jpg
    95 KB · Views: 22
With the stinger bonded together, It was time to cut out the existing one. At this time I also cut out the two bulkheads that hold the gas tank in. Once cut out, It was back to the joys of grinding... :)
 

Attachments

  • 10-10-2009 OHIO 016.jpg
    10-10-2009 OHIO 016.jpg
    96.8 KB · Views: 11
  • 10-10-2009 OHIO 014.jpg
    10-10-2009 OHIO 014.jpg
    96.6 KB · Views: 18
  • 10-10-2009 OHIO 013.jpg
    10-10-2009 OHIO 013.jpg
    94.1 KB · Views: 16
I finally got the grinding done and was happy to know I was closer to having the 2 out 4 stringers replaced...
 

Attachments

  • 10-10-2009 OHIO 017.jpg
    10-10-2009 OHIO 017.jpg
    101.3 KB · Views: 7
  • 10-10-2009 OHIO 018.jpg
    10-10-2009 OHIO 018.jpg
    96.6 KB · Views: 10
  • 10-10-2009 OHIO 019.jpg
    10-10-2009 OHIO 019.jpg
    91.9 KB · Views: 11
After the inside was all ground down. The next following week I spent fitting the stringer in. I was happy I broke down and purchased a planer. That definately speeded up the process. Once fitted, Ang came out to help bond the stinger in. The next day while the filler was still tacky we glassed it in..
 

Attachments

  • 10-10-2009 OHIO 042.jpg
    10-10-2009 OHIO 042.jpg
    96.6 KB · Views: 35
  • 10-10-2009 OHIO 044.jpg
    10-10-2009 OHIO 044.jpg
    76.3 KB · Views: 12
  • 10-10-2009 OHIO 045.jpg
    10-10-2009 OHIO 045.jpg
    86.8 KB · Views: 19
To keep the stinger in placed I made some braces. To keep the stinger level and the braces tight, I used wood door shims from the local Menards.
 

Attachments

  • 10-10-2009 OHIO 055.jpg
    10-10-2009 OHIO 055.jpg
    88.4 KB · Views: 15
  • 10-10-2009 OHIO 054.jpg
    10-10-2009 OHIO 054.jpg
    84.5 KB · Views: 11
  • 10-10-2009 OHIO 052.jpg
    10-10-2009 OHIO 052.jpg
    83 KB · Views: 13
FYI, Working with the bonding filler I used the West Systems sticks and many of the techniques presented in there books.. I found the braces to work good. It just made it interesting getting out from under the deck. I felt like Twister, Left hand on yellow......
 

Attachments

  • 10-10-2009 OHIO 060.jpg
    10-10-2009 OHIO 060.jpg
    94.9 KB · Views: 10
  • 10-10-2009 OHIO 061.jpg
    10-10-2009 OHIO 061.jpg
    86.6 KB · Views: 11
  • 10-10-2009 OHIO 063.jpg
    10-10-2009 OHIO 063.jpg
    100.6 KB · Views: 20
The next day we got back and put 3 layers of 1700 biax in. Not to many pics, didnt have time...
 

Attachments

  • 10-29-09 johnson creek 058.jpg
    10-29-09 johnson creek 058.jpg
    107.6 KB · Views: 26
  • 10-29-09 johnson creek 060.jpg
    10-29-09 johnson creek 060.jpg
    56.8 KB · Views: 19
  • 10-29-09 johnson creek 072.jpg
    10-29-09 johnson creek 072.jpg
    84.2 KB · Views: 35
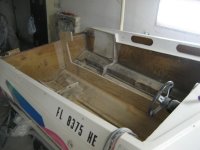
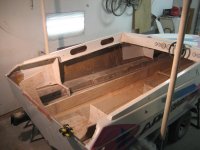
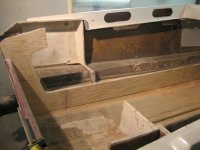
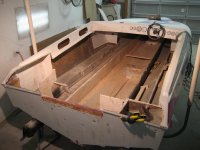
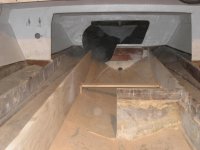
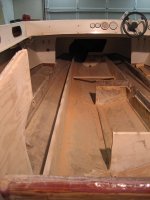
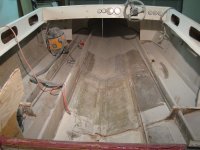
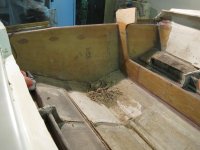
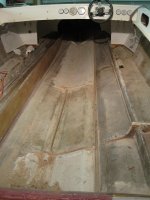
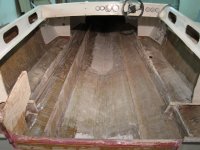
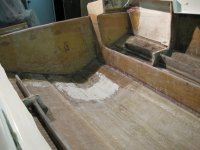
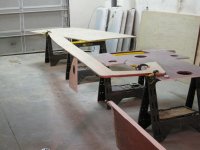
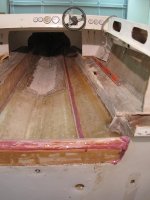
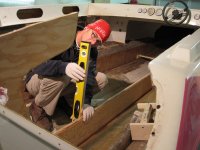
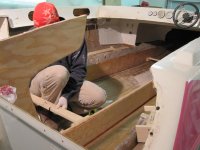
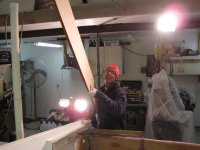
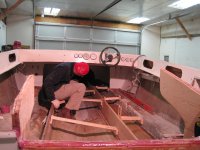
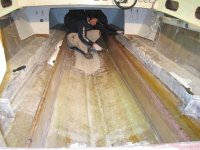
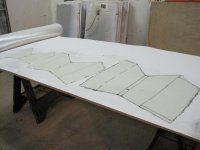
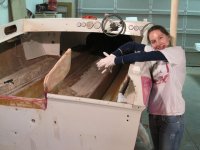
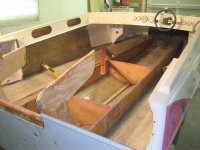
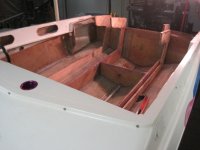
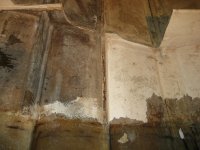
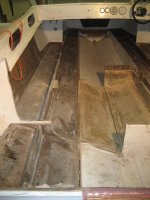
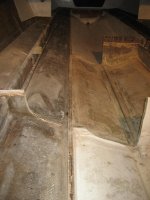
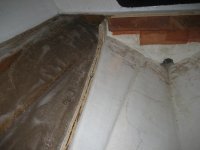
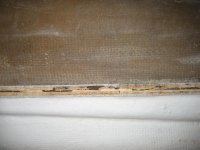
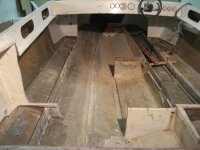
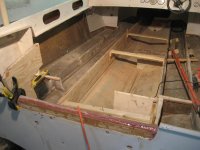
After the stringer was installed it was time to replace the bulkheads that hold the gas tank in. Since the inside was prepped already, all I had to do was cut, fit, bond, and glass them in. Again, I left the camera at home for a good amount of the following work. I used the same processes as I did with the stringers. Once installed I decided to tackle the last two stringers at the same time. Winter was coming and I wanted to speed it up. I made a template of one of the stringers and used it to cut all the peices. I bonded them up using to layers of 1/2" ply. In between them, just like the transom, I used one layer of1300 biax and made sure to stagger the joints. I did all the bonding while the shop was clean still from installing the stringers & bulkheads. Once bonded, I then cut out the old and prepared for the new. That brings me to the pics below...
 

Attachments

  • Dec 25 2009, christmas 052.jpg
    Dec 25 2009, christmas 052.jpg
    90.2 KB · Views: 20
  • Dec 25 2009, christmas 054.jpg
    Dec 25 2009, christmas 054.jpg
    60 KB · Views: 27
Man what a project! Nice work J-Bonz, you are fortunate to have good friends who are willing to help! :cheers2:

Thanks for the thread, great reading on a O degree morning!

Kurt
 
What an incredible job. And an incredible amount of work. You'll never be able to part with that boat......

Love the thread.....
 
Back
Top