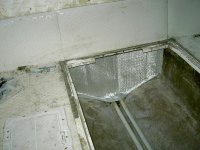
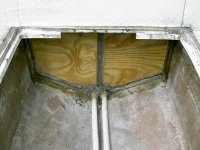
That pic is the same area that was rotten wood in an above post. It has new 23/32 behind it, which is bonded to the existing glass that was between the bad wood and the engine compartment. It is bonded using two layers of chop strand mat all resined in and bolted. This new mat covers that, and will be the aftmost backer for the tank.

")


")