1997 CC Remake

Mine has a removable rear bench. I went with the walk thru transom but never use it. When I do it again I'd like to go with 2 rows of bolsters and a rear bench if room permits. It could work on a kevlar 36 Concept Open w/trip 300XS's.

What are you thinking you will go with?
 

Attachments

  • boat (114).JPG
    boat (114).JPG
    49.5 KB · Views: 8
  • boat (245).JPG
    boat (245).JPG
    36.4 KB · Views: 8
My take out rear seat in very basic, no back rest, just a pad with fold down legs. I'm going with something more like yours. How often do you fill up with oil? My access will be behind the seats and want to know how often I'll need to get at it.
 
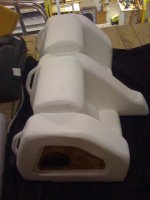
I had 1.8 gallon tanks and swapped them out for 3 gallon tanks- the bigger the better. They are Smartcraft tanks so they tell me the level and when they are low. When they show 1/2 full I fill them up and carry a 2.5 gallon jug onboard just in case. It's been a while since I ran the numbers but I think I burn 1 gallon of oil per motor for every 100 gallons of fuel. Boat holds 212 gallons so that is a 2.5 gallon jug for every fill up. I fuel up when I get under 100 gallons but never seem to fuel and oil at the same intervals. A cruise 10 miles away has turned in to a long weekend 100+ miles each way more than once so I like to be ready. That along with my boat runs better in the rough with the extra weight.

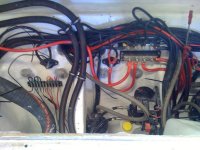
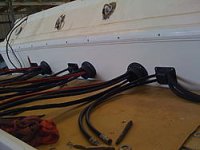
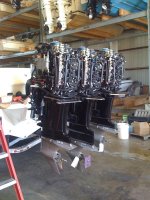
FYI- The motors have an oil reservoir on them and then the remote tanks. If you run low and all you have left is the tank on the motors, when you fill the remote tank you have to take off the cowling, crack the top of the motor mounted reservoir to let the air out and the remote tank will pump it full and then seal the cap again. Don't ask... At least the mechanic I called out at 2PM on a holiday weekend only charged me the minimum $350 for the service call to show me that...

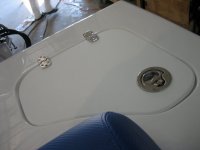
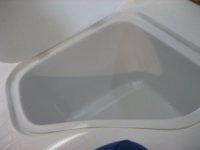
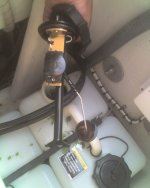
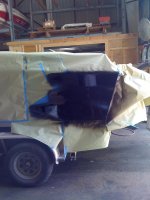
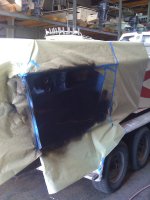
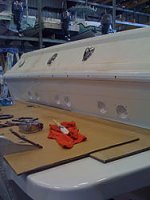
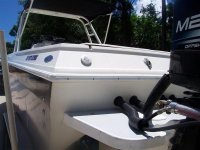
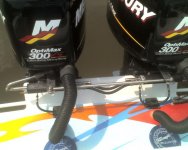
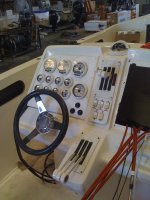
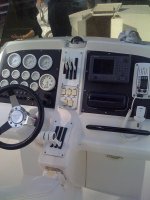
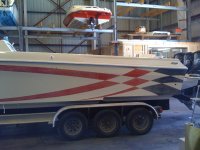
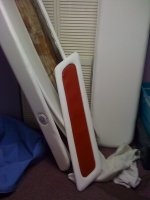
See that triangle opening on the back right behind the cup holders? It has a tray in there and then the oil tanks under it. 3rd pic is the Smartcraft sensor thing. You can adjust it for any size tanks but I think 1.8 and 3 gallon sizes are a kit from Mercury but not sure.
 

Attachments

  • boat (237).JPG
    boat (237).JPG
    29.6 KB · Views: 6
  • boat (238).JPG
    boat (238).JPG
    16.6 KB · Views: 5
  • oil2.jpg
    oil2.jpg
    29.3 KB · Views: 8
More electric and the black was added today
 

Attachments

  • IMG_0394.jpg
    IMG_0394.jpg
    75.6 KB · Views: 8
  • IMG_0396.jpg
    IMG_0396.jpg
    58.8 KB · Views: 7
  • IMG_0397.jpg
    IMG_0397.jpg
    63.1 KB · Views: 5
Single or twin step? Can't tell with it on the trailer but the pics (best view in post 25) but looks to be a single step? Looks pretty far back? Is the helm positioned further up to offset the weight of trips?

Along the rear- holes are _____? Post 28 has them shown better but I can't tell- lights?

Hope you get'er wet sooner than later- nice project!

Single step same bottom as the stiletto
These holes for the cables?
 

Attachments

  • IMG_0300.jpg
    IMG_0300.jpg
    10.1 KB · Views: 148
  • IMG_0310.jpg
    IMG_0310.jpg
    9.9 KB · Views: 148
How big are your tanks, where are they located, are they switchable and if not which does the center feed off?

Just a thought- have you thought about running the rigging thru the bracket vs thru the transom? Just an idea while you were painting stuff- wouldn't take much to do at all IF you liked that look.

Less clutter and less exposed to the elements IMHO. I love my Concept but wish I had a 37 OL w/trips so not criticizing by any means at all what-so-ever; just tossing out ideas you may or may not have thought of...

ps- that is my old steering and tie bar; new stuff much better and stouter (thanks to OSO Steve and many others help) but this is the only pic I have on hand explaing what was talking about.

I think the trim is the black box with the 2 tubes coming out of it in front of each motor and the hydraulic steering is the fittings on the top right of the bracket.
 

Attachments

  • tie2.jpg
    tie2.jpg
    56.5 KB · Views: 8
Last edited:
Looks alot cleaner, I think I'll do that when I get it back in Wisconsin. Got the dash in today, before and after pics
 

Attachments

  • IMG_0399.jpg
    IMG_0399.jpg
    71.8 KB · Views: 13
  • IMG_0119.jpg
    IMG_0119.jpg
    61.2 KB · Views: 15
Wing plates on each motor and cut the bottom of the cowlings
 

Attachments

  • IMG_0402.jpg
    IMG_0402.jpg
    89.1 KB · Views: 5
  • IMG_0403.jpg
    IMG_0403.jpg
    90.2 KB · Views: 14
Final sanding is done and interior is waiting till the wiring is all done
 

Attachments

  • IMG_0406.jpg
    IMG_0406.jpg
    67.3 KB · Views: 4
  • IMG_0404.jpg
    IMG_0404.jpg
    48.7 KB · Views: 5
  • IMG_0405.jpg
    IMG_0405.jpg
    42.8 KB · Views: 4
Back
Top