Sunsation96
Charter Member
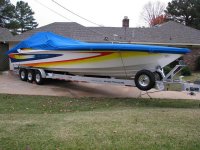
Awesome now post some pics of the paint.... PLEASE!!!!
That is a strong number rob...You have went way above and beyond with that boat.....I would think that is the fastest 388 out there........What did the boost brothers run i cant remember.....Have you done bottom work also?
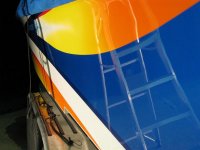
Looks great love the lowers.....I tried to get my old #3's to shine but they never looked like yours...
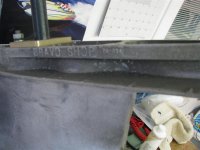
 I know he puts a seal inside the case some it doesn't leak thru ,Ive has some caps with oil coming out the pin holes before.Micro zoom
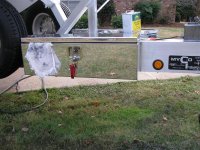
Nocig this is a pick of the porosity,They keep coming back up if I grind them out,Dean said I couldn't sand thru
")
Thanks,the turing in of the props made a diff,I wonder what it would of run with out the slack in the drive from the broken ginble ring,Before the ran I checked the tow in and it was 13/16 towed in,thats running 102,I adjusted it as far as the tie bar would go,it needed more thread, prob because of the slack, so it was flopping,adjusted to 3/8 tow.Ive really never done much testing,Ive always just run a stock 30p bravo ones, Brett wants to lab a set of 32 Ive .I tried the 32 ,it still ran the 102 but didn't want to buz,felt sluggish the 30's can go 6000.on the dyno at 5900 it only was gaining 5-7hp per 100 rpm up to 6200.
My buddy Jason On OSO has a 388 also,around 1000hp guessing,bravos and extension box, he has already hit 110 and has only been running for 3 months, I know with some testing and props testing he has more in it!!!
I know of 3 other 388 that claim 108, One I trust.If there is some other Ive never heard of them or seen them on the board,just need to know the pitch,rpm,gear.:03:
Boost bro was around 140ish,the had a lot of mods,big arninson's,In the beginning Zull dynoed one at upper 1300hp,I'm "guessing" they were agood bit over 1400 when they ran the #'s,They built there own motors.
its take time sanding them down to get ready to polish,Also there are different grades of aluminum, We allegedly use to steal hwy signs.that grade would not polish out chrome looking.I bet your #3 will,I went from 36 grinding,belt sanding,then 80,120,320 alto,500 loaded up,then hand 500,800,I still has some coarse sanding marks,that showed up in the buffing,Kinda like in a new paint job,you have to spend a little time so the job will come out shinny,If ya need some help just holler.
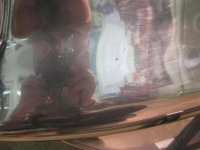
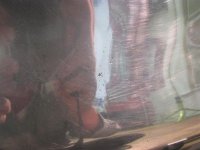
On my Chevelle the windshield washer motor is a mixed pot metal alum,I buffed it in 1991,Ive just windexed since.you can see it to the left of the brake booster
Rob:driving:
Big pick
.
Hey Rob, if oil can seep out, what stops water from seeping in?
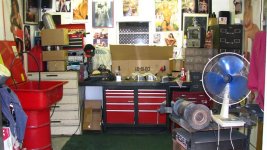
PS, I thought I was alone in the polish everything club. Every nut, bolt, washer, screw head, fitting yada yada yada.
Over 600 pieces and 5 polishing wheels for my rerig project.
I left the lower on my new drive ugly though. Every mph counts

What did u use to polish all that ???
Any special tricks to make it easy ???
PLEASE LET US KNOW !!!!!:USA:
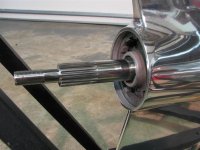
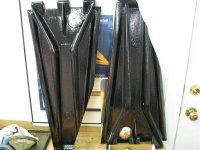
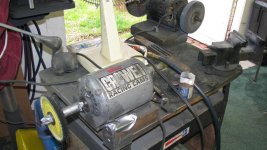
 after the sanding on the foot, I had some old wool buffing pads and a buddy works for a polishing material co ,so I got 1st and 2nd cut liquid compounds,he must of gave me 10 gallons,it was free so i used it ,it would get a shine on the drives, Next I took the miketia paint buffer and put 2 6inch sisal,Cotton wheels on it,turned it up on end and used white rouge,the first time it worked pretty good last week it didn't really want to shine back up, I used some cleaner wax and Cotton wading stuff by hand,its still alittle cloudy.the first piece always turns out better ya get tired on the second one
Anodes polish easy
screws and bolts are a piece of cake. Chuck them in a drill, spin them against some sand paper in your hand to remove the manufactures markings and grade stamps and then take them to the buffing wheel. Coarse compund first and then finnish compund on the second wheel. Unchuk em and let em fall out of the drill. DO NOT TOUCH THEM .......trust me on that part.
I have a couple nice thread shaped scars from that lesson.
Nuts, thread them onto a piece of wooden dowel to make holding them easy. I used a dremel held in a vice with a sanding disc to clean them up a bit before polishing them.
Washers I screwed to a board leaving them just loose enough to rotate. Hit them with a body polisher with a wool pad and 3m finnish cut after a quick spin with the sanding dremel.
All told, I polished over 600 fastners and about 150 flat washers that way.
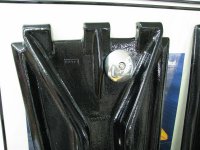
now thats kinda funny right there knowing full well its a sacrificial piece . . . . nuts . . . but funny
don't forget the tip on the end of the oil drain plug
but its kinda faded though.:boobflash:I did some of the bolt heads takeing the markings off,alot were allens,they dont shine up much ,if ya take the lines off the side they would show up very good anyway.I have tryied the drill press, I usally just hold them on the buffer,burn your fingers and drop it and grag anouther,I know when i get burned thru the glove I pressing to hard.
hey this thread is turning into a buffing thread:cheers2:
Air have ya had the buffer grab something your polishing and chunk it,stick into the sheet rock? after it hits your hand,that hurts:huh:
 . after the pieces slammed into imoveable objects and got screwed.
Burning the fingies is why I chuck them in a drill Rob. I think I figured that out after I burned them, then put on leather gloves and burned em again
Spinning them in the drill against the polishing wheel makes it a snap and no more burned finger tips.
No drywall in my work shop but I did take a 1/2" nut off the forehead. That left a mark. I may find it some day or maybe not
Unfortunately, snagging things on the wheel happened a few too many times. A couple even sent me back to re fabrication
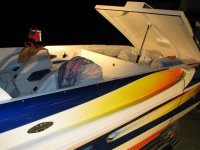
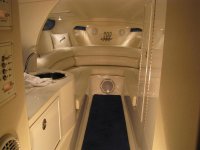
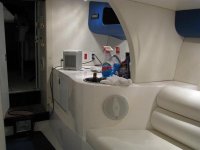
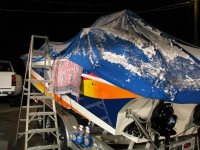
gota make sure I wear my safty glass'ssnowed pretty good,heater in boat,alittle beer made it warm enough made a T pee with the coverpolished all the gel coat in the cabin,used the 3m ultra Fina, got a pretty good shine,then waxed it and even waxed the walls in the bathroom,shinny.Next polish stainless sink.Rob are your lowers standard or shorties?
Thanks, Steve