Converting a Race Boat into a pleasure Boat

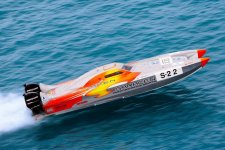
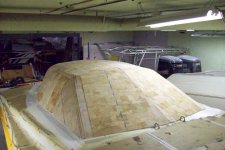
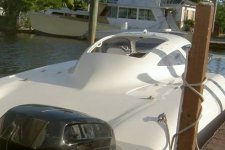
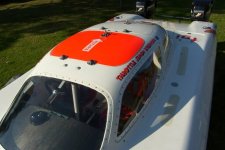
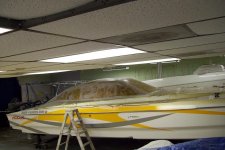
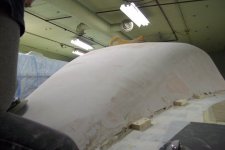
Must be the picture angle or shrink wrap. I built the canopy to look like this, the only big difference is the windshield angle. I lowered mine to a 25 degree for a smoother look.

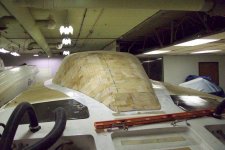
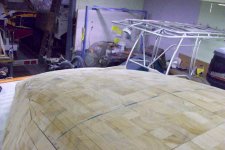
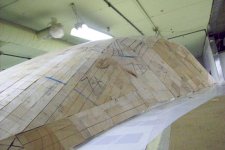
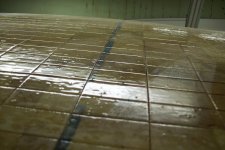
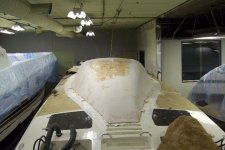
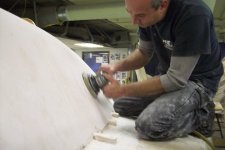
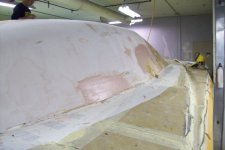
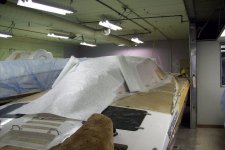
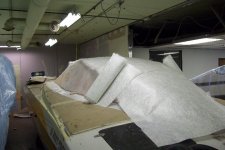
This weekend I started the jig-saw puzzle of adding the balsa-core to the project. I think I spent more time thinking than doing physical work.
 

Attachments

  • CAD Drawing 3.jpg
    CAD Drawing 3.jpg
    43 KB · Views: 33
  • Airlie Beach - blue.jpg
    Airlie Beach - blue.jpg
    103.2 KB · Views: 37
Well I started the worlds biggest jigsaw puzzle last week and now its finished!

I must have 8-10 hours in this part :toetap05:

I'll shim and glue it into it's final positions this weekend before I start laying the resin.
 

Attachments

  • Remove - 98.jpg
    Remove - 98.jpg
    92.5 KB · Views: 58
  • Remove - 99.jpg
    Remove - 99.jpg
    88.4 KB · Views: 54
  • Remove - 102.jpg
    Remove - 102.jpg
    84.4 KB · Views: 50
  • Remove - 103.jpg
    Remove - 103.jpg
    74.1 KB · Views: 58
The straight line angles and Sharpe edges work great with the boats lines. The pictures don't really show the whole view and how the lines flow.

Overall I happy with the results just not the amount of time this project is taking working 3 hrs twice a week..
 

Attachments

  • Remove - 105.jpg
    Remove - 105.jpg
    86.9 KB · Views: 47
This is a great thread and always look forward to updates. Just a question for you. Are you going to leave it closed canopy with lids or cut open the top to make it a windsheild?
 
Right now the plan is to make a dual lid system. The first lid over the driver/throttle area will be a normal "smaller" one. The second lid over the back seats will be a little larger so it can be removed for pleasure boating.

Like a hard to convertible.
 

Attachments

  • Duel Lid 1.jpg
    Duel Lid 1.jpg
    83.7 KB · Views: 33
  • Duel Lid 2.jpg
    Duel Lid 2.jpg
    81.9 KB · Views: 36
  • Duel Lid 3.jpg
    Duel Lid 3.jpg
    72.9 KB · Views: 28
  • Duel Lid 4.jpg
    Duel Lid 4.jpg
    76.5 KB · Views: 36
Last edited:
Right now the plan is to make a dual lid system. The first lid over the driver/throttle area will be a normal "smaller" one. The second lid over the back seats will be a little larger so it can be removed for pleasure boating.

Like a hard to convertible.

That will be a very nice setup!
 
we're currently building a 34' (38' overall) mono with a partial canopy for Endurance racing in the UK - we need to have a 1.3 metre square hole to exit out of to comply with the rules and it will look like this. We have made the plug and moulds and are going to join the hull and deck whilst all still in the moulds to give us a seamless boat with no rubrail - The leisure version will have a removable roof that will fit in the engine compartment and be used for rainy or cold days - it will be used in England after all!
 

Attachments

  • P019_018.jpg
    P019_018.jpg
    75.4 KB · Views: 23
  • P019_025.jpg
    P019_025.jpg
    107.6 KB · Views: 27
  • P019_026.jpg
    P019_026.jpg
    208 KB · Views: 29
  • P019_027.jpg
    P019_027.jpg
    63.9 KB · Views: 22
This weekend:

I used a hot glue gun and some "shims" to attach the balsa to the shrink wrap. This should allow for easy removal of the part when the glass work is finished.

We than mixed some resin and started applying it to the lid. The fist batch was mixed a little light and once it got tacky I applied another "hotter" batch. The resin flowed nice and filled most the smaller crack in the balsa.
 

Attachments

  • Remove - 113.jpg
    Remove - 113.jpg
    80.4 KB · Views: 29
Next I used "gunk" to fill in the larger cracks and gaps in the balsa-core. I also used it to help even out the high's and lows.

I'll be using a professional at this point to do the finish body work so the part looks right. But no more updates for a few weeks.. I have to put the Sea Ray up for the winter and Gary and I need to get ready for the OPA World's race in Orange Beach..

:driving:
 

Attachments

  • Remove - 109.jpg
    Remove - 109.jpg
    87.1 KB · Views: 50
Next step was to skim coat and body work the balsa-core to a nice smooth surface. This will help keep any air voids from forming when we lay the first layer of cloth this week.
 

Attachments

  • Remove - 118.jpg
    Remove - 118.jpg
    68.4 KB · Views: 35
  • Remove - 117.jpg
    Remove - 117.jpg
    50.3 KB · Views: 30
  • Remove - 116.jpg
    Remove - 116.jpg
    50.9 KB · Views: 30
The balsa core is ready to have its first layer of cloth applied later this week..
 

Attachments

  • Remove - 121.jpg
    Remove - 121.jpg
    46.7 KB · Views: 32
  • Remove - 122.jpg
    Remove - 122.jpg
    68.8 KB · Views: 28
  • Remove - 123.jpg
    Remove - 123.jpg
    67.3 KB · Views: 27
If you notice we never did any body work up front or near the side windows. I'm going to build up any low areas there with cloth & resin for a stronger finish because those area will have material (holes) cut for the windows.
 
If you notice we never did any body work up front or near the side windows. I'm going to build up any low areas there with cloth & resin for a stronger finish because those area will have material (holes) cut for the windows.

You know what I noticed is that I never see you doing the dirty work. It's always Darryl :smash:
 
Back
Top