Converting a Race Boat into a pleasure Boat

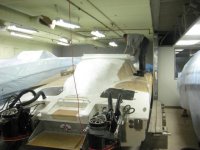
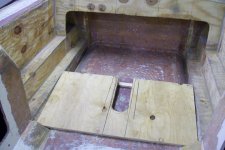
I just noticed this thread. Wow is all I can say.

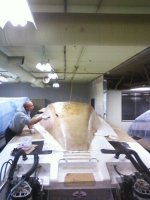
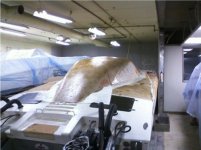
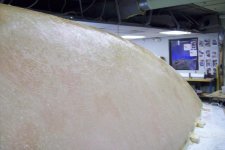
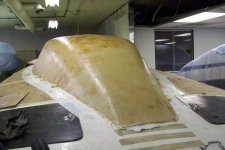
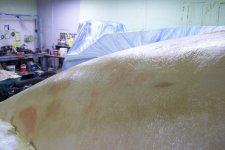
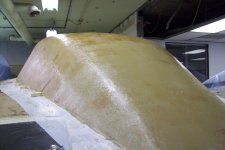
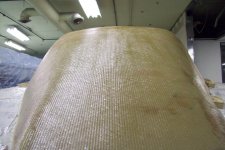
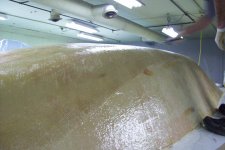
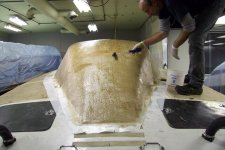
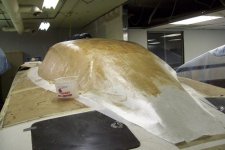
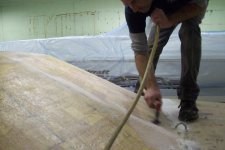
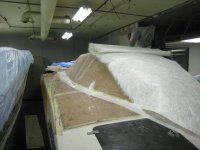
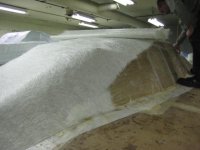
While I might have the mechanical ability to pull something like this off, I certainly do not possess your determination, drive, and willingness to wear fiberglass!!! I was sweating, itching, and scratching just reading the first two pages!

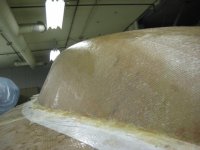
Kudos to a spectacular build!!! Looking forward to watching your progress and seeing the final result.
 
Last night we placed the first real piece on top; 1-1/2oz Chopped Strand Mat and does it suck up the resin, We used almost 2 gallons on this alone.
 

Attachments

  • Remove - 131.jpg
    Remove - 131.jpg
    45.4 KB · Views: 61
  • Remove - 132.jpg
    Remove - 132.jpg
    41.4 KB · Views: 56
  • Remove - 133.jpg
    Remove - 133.jpg
    50 KB · Views: 61
Those above 3 pictures were taken with my phone so they may be a little grainy. I stopped in this morning a shot a couple more of the dry part with a real camera.

Our next step will be a layer of 1708 cloth ...
 

Attachments

  • Remove - 129.jpg
    Remove - 129.jpg
    64.7 KB · Views: 39
  • Remove - 128.jpg
    Remove - 128.jpg
    74.1 KB · Views: 41
  • Remove - 126.jpg
    Remove - 126.jpg
    76.9 KB · Views: 38
  • Remove - 124.jpg
    Remove - 124.jpg
    67.5 KB · Views: 41
NEXT... 1708

We scuffed up the chop cloth and cleaned the area to get ready to apply the first sheet of 1708 cloth. This cloth is the real strength to the lid, we will have one layer on the outside and 2 on the inside.

Once the sheet of 1708 was cut we mixed up a gallon of resin and started wetting out the cloth. It laid on perfect flowing around the corners.

Once it was laid out Darryl rolled out any air bubbles and used a plastic bondo squeegee to remove the extra resin.

:sifone:

It's been a good week.
 

Attachments

  • Remove - 139.jpg
    Remove - 139.jpg
    87.4 KB · Views: 44
  • Remove - 138.jpg
    Remove - 138.jpg
    72.5 KB · Views: 37
  • Remove - 137.jpg
    Remove - 137.jpg
    78.6 KB · Views: 43
  • Remove - 136.jpg
    Remove - 136.jpg
    67.6 KB · Views: 43
  • Remove - 134.jpg
    Remove - 134.jpg
    66.5 KB · Views: 38
  • Remove - 135.jpg
    Remove - 135.jpg
    59 KB · Views: 38
As soon as you're done, I have a hull to put a canopy on......:D


Looking really good Rick.....
 
2nd Layer of 1708 is now on and this canopy is pretty strong. Two of us were able to sit on the top with very little flex in the part. Once we apply another layer on the inside with the glassed in bulk head/roll bar it should withstand most any hit.

We did make sure to make the over-laps 16 inch's on the top center and corners along with a few extra pieces on the front whindsheild. This was done to add even more strength encase roll over or hit.
 

Attachments

  • Remove - 142.5.jpg
    Remove - 142.5.jpg
    43.9 KB · Views: 23
  • Remove - 142.4.jpg
    Remove - 142.4.jpg
    41.4 KB · Views: 23
  • Remove - 142.3.jpg
    Remove - 142.3.jpg
    63.8 KB · Views: 23
  • Remove - 142.2.jpg
    Remove - 142.2.jpg
    70.4 KB · Views: 26
Now that the multiple layers of 1708 cloth has been applied we can now prep the part for body work

This is done by once again covering the part with 1.5oz chop cloth. This chop cloth is applied so when body working the part with sand and cut into the chop, not the 1708 with is the strength of the part.

The part should be ready to pull in the next day.
 

Attachments

  • Remove - 147.jpg
    Remove - 147.jpg
    47.7 KB · Views: 33
  • Remove - 146.jpg
    Remove - 146.jpg
    38.3 KB · Views: 26
  • Remove - 145.jpg
    Remove - 145.jpg
    41.4 KB · Views: 30
  • Remove - 144.jpg
    Remove - 144.jpg
    41.2 KB · Views: 27
  • Remove - 143.jpg
    Remove - 143.jpg
    46.7 KB · Views: 34
We pulled the canopy free .. it's lighter than the F16, maybe 150lbs so far but very awkward to move around with only two people. Tonight we will be building a nice 'large" square table to work on.
 

Attachments

  • Remove - 150.jpg
    Remove - 150.jpg
    44.7 KB · Views: 35
#1 The floor base is made from 3/4 marine plywood. Once everything is mocked up and finalized we will make an aluminum seat base that will be attached from the bottom, also the seat base will be glassed down with 1708

#2 next was this channel will house my throttle and shifter cables, maybe other junk.. not sure yet.

#3 Shifter box made from 3/4 9*notice the flat spot on top, I made that as a step for climbing in and out.

#4 also we made a arm rest in the center that will double as a step for climbing in and out of the boat.

I'm happy with the angle of the seats and throttles and have lots of legs room so I'll pull everything apart and router the edges and start glassing the undersides of all hidden parts.
 

Attachments

  • Remove - 151.jpg
    Remove - 151.jpg
    76.5 KB · Views: 20
  • Remove - 152.jpg
    Remove - 152.jpg
    69.6 KB · Views: 19
  • Remove - 153.jpg
    Remove - 153.jpg
    65.7 KB · Views: 36
  • Remove - 154.jpg
    Remove - 154.jpg
    71.4 KB · Views: 39
You've done amazing work with great detail. IMO you may want to re-think the throttle box and it's position......

Just curious as to why? I have built 4 or 5 and each one is a little different with different angles.

This one is very comfortable with the seat angle and I don't feel to cramped (6'3") and Gary (5'5) does not have to stretch to use it.

Of all of them this feels the 'best" but I'm open to suggestions and ideas
 
It's just my opinion, but, it looks like an after thought there and in the wrong position. I would rather see a set of Latham or Skater throttles in there. I actually took this same set of throttles out of my 24' and replaced them with used Latham throttles. I guess I just like the looks of the "race" set up of the stringer or top mounted throttles, not "the box". I AM really amazed at the work you've done and think you are doing a great job.
 
Thanks!,
Once done we will start on the Skater.

Rick - lets see if I can get the house projects done before you finish the canopy! Rather than spending my cash on boring things like carbon fiber and number six drives for the skater I've been spending it on cool stuff like flooring, light fixtures and appliances :rolleyes:
 
Amazing thread!
Amazing project!

Last comment reminds me of the harley commercial from a few years ago:
Scene:Front porch Grandpa and Grandsom...Fairly noisey Sportser rolls down road in front of farmhouse.
Grandpa:I remember my Harley...
Grandson: Grandpa, you had a Harley?
Grandpa:Nope. Got aluminum siding instead:(
 
Just curious as to why?

Of all of them this feels the 'best" but I'm open to suggestions and ideas

Everything looks great.. As far as the throttles go it appears you have to push them up as you push them forward.. My initial thought is that won't be very comfortable..

Carry on ..
 
Back
Top