Ilmor 725/Indy build from the beginning

The engine has essentially the same dimensions as the Chevy big-block. Even though it's a V-10, it has closer bore spacing, and the width across the headers is about 33".

We are already signed up for JOTJ, so we'll see you there, Macklin!

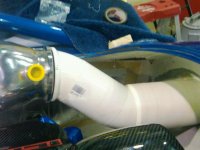
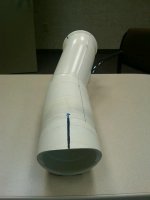
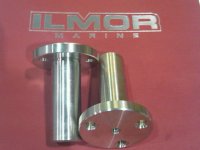
Got my tailpipe mockups made, and pulled everything back out today. Bilge cleanup and final rigging starts next week.
 

Attachments

  • 20100411_StbdOverall_In.jpg
    20100411_StbdOverall_In.jpg
    36.4 KB · Views: 35
  • 20100411_TailPort.jpg
    20100411_TailPort.jpg
    31.8 KB · Views: 23
  • 20100411_TailStbd.jpg
    20100411_TailStbd.jpg
    28.6 KB · Views: 20
Last edited:
Chuck what is the exhaust mock up made from?
PVC pipe. 4" PVC has an OD of 4.5", which is the same as the outer tube will be, and 4" couplers have an OD of 5", which is what the mufflers will be. Sure is a WHOLE LOT easier than working with stainless, but the static electricity makes all the chips and dust stick to everything like mad.
 
PVC pipe. 4" PVC has an OD of 4.5", which is the same as the outer tube will be, and 4" couplers have an OD of 5", which is what the mufflers will be. Sure is a WHOLE LOT easier than working with stainless, but the static electricity makes all the chips and dust stick to everything like mad.

NICE :cheers2:
 
Check out how butch the trim ram pin and trim pivots pins are....
 

Attachments

  • 20100411_RamPin.jpg
    20100411_RamPin.jpg
    44.9 KB · Views: 12
  • 20100411_TrimPins.jpg
    20100411_TrimPins.jpg
    42.3 KB · Views: 9
Nice folder!! :driving:
I think it's what the owners' manuals go in, if you remember to send them. You must have been so excited to pack this little jewel up that those items slipped by you. :willy_nilly:

...or do you have so much confidence in my mechanical abilities that you presumed that I could figure everything out on my own? :huh:

Now that I think about it, this may be the first ever customer-installed Ilmor package. Have all the others been factory installations?

Don't worry - Customer Service has me sorted out. :toetap05:

I'll get your drill jig returned to you as well. (That thing is awesome.)
Yes you are #1 customer installer, and i have the total confidence in your ability and I am part of customer service!!! :kiss: Im here for you also...haha
 
Yes you are #1 customer installer, and i have the total confidence in your ability...

Hey! How about that!!! :cheers2:

...and I am part of customer service!!! :kiss: Im here for you also...haha
Fair enough, but being there is not quite as helpful as being here when it comes to actually getting the physical work done... :smash:

By the way, Paul Milligan helped me out with the details on the Indy drive trim sensor, so I ordered two more to adapt to my tabs as well. That setup is sooooo simple and sooooo trick!! Instead of having a nightmare of cables, linkages and holes in the transom, your setup is almost impossible to even see, uses a simple water-tight connection integrated into the transom shield, and is cheap to fix (if it ever fails). Brilliant.

Now I can use the LED bar-graph position readout for all three. I was going to buy the Mercury SmartCraft sensor setup, but the total for all that crap was over $800 for the two tabs. Doing it the Ilmor way will set me back about $120 or so, and is way, WAY simpler. You guys do a great job of thinking outside the box!

Where's the dyno video????!!!!
 
Ian still has the files and he's at an undisclosed location right now ;). I will get it to you asap when he returns.
 
Started on the engine mounts today. That's a 3/4"-10 UNC bolt you see in the middle...
 

Attachments

  • 20100416_MountsB.jpg
    20100416_MountsB.jpg
    41.4 KB · Views: 26
Engine mounts are done (less powdercoat). Now I have to start on the spacers to compensate for them being further forward and higher...
 

Attachments

  • 20100417_Mounts.jpg
    20100417_Mounts.jpg
    34.3 KB · Views: 13
Back
Top