procharger on a 25 outlaw ho

JerseyOutlaw

New member
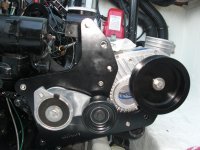
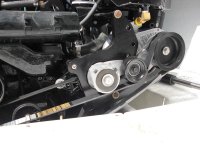
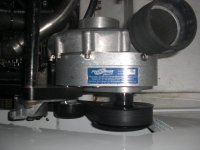
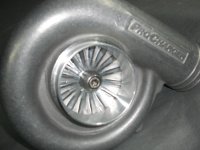
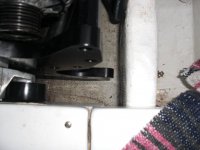
this is the way the kit is supposed to sit on the motor, 19" from the center of the crank pulley. In a 25 Outlaw the stringer is 16.5" from the center of the crank pulley, he's a few pics to show it doesn't fit :cuss:
 

Attachments

  • 496specs.jpg
    496specs.jpg
    48.9 KB · Views: 9
  • CIMG5982.jpg
    CIMG5982.jpg
    65.7 KB · Views: 5
  • CIMG6253.JPG
    CIMG6253.JPG
    79.3 KB · Views: 6
  • CIMG6256.JPG
    CIMG6256.JPG
    89.8 KB · Views: 9
  • CIMG6258.jpg
    CIMG6258.jpg
    100.2 KB · Views: 7
  • CIMG6257.jpg
    CIMG6257.jpg
    71.3 KB · Views: 7
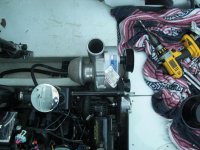
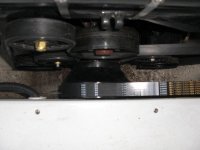
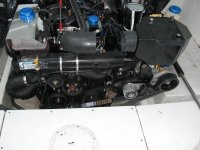
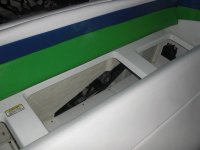
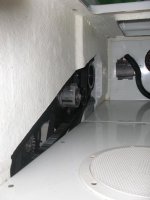
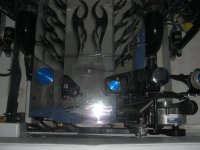
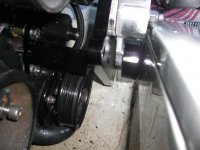
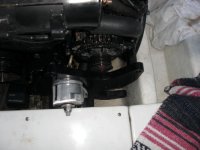
here's the new location for the charger above the stringer, works great I ran it up to 5200 rpm with the belt on just no boost going into the motor, pic of the clearence of the crank pulley:eek: the intercooler is going under the rear bench seat, I just put it on the motor for the pic
 

Attachments

  • CIMG6334.JPG
    CIMG6334.JPG
    116.1 KB · Views: 6
  • CIMG6336.JPG
    CIMG6336.JPG
    104.6 KB · Views: 5
  • CIMG6420.JPG
    CIMG6420.JPG
    72.9 KB · Views: 5
  • CIMG6422.jpg
    CIMG6422.jpg
    85.6 KB · Views: 4
  • CIMG6406.jpg
    CIMG6406.jpg
    90.2 KB · Views: 6
  • CIMG6414.JPG
    CIMG6414.JPG
    105.1 KB · Views: 6
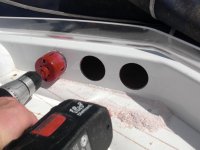
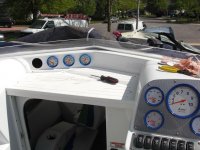
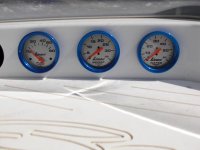
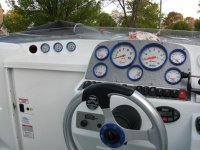
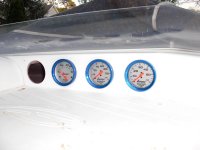
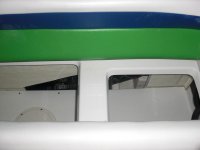
Here's some pics of the gauge install, the holes were drilled with a perfectly measured template made out of 1/2" plywood that I layed up against the fiberglass to start the holes. The 4 gauges are water pressure, fuel pressure, boost, and an egt gauge.a pic of the dump for the intercooler right under the swim platform above the drive
 

Attachments

  • CIMG6404.JPG
    CIMG6404.JPG
    83.7 KB · Views: 3
  • CIMG6410.JPG
    CIMG6410.JPG
    110.5 KB · Views: 7
  • CIMG6411.JPG
    CIMG6411.JPG
    73.9 KB · Views: 6
  • CIMG6416.JPG
    CIMG6416.JPG
    117.6 KB · Views: 4
  • CIMG6418.jpg
    CIMG6418.jpg
    62.5 KB · Views: 7
  • CIMG6556.jpg
    CIMG6556.jpg
    41.5 KB · Views: 4
A few pics of the charger with the back seat in, the only cutting that had to be done was to the rear bench to clear the pulleys
 

Attachments

  • CIMG6544.JPG
    CIMG6544.JPG
    66 KB · Views: 5
  • CIMG6545.JPG
    CIMG6545.JPG
    75.4 KB · Views: 9
  • CIMG6553.JPG
    CIMG6553.JPG
    54.2 KB · Views: 3
  • CIMG6557.jpg
    CIMG6557.jpg
    66.2 KB · Views: 4
  • CIMG6541.jpg
    CIMG6541.jpg
    66.4 KB · Views: 5
  • CIMG6537.jpg
    CIMG6537.jpg
    81.9 KB · Views: 6
now here's where all the $$$ is going. I need to ditch the cool fuel setup, im going with a Aeromotive black A1000 pump, the ATI 5:1 boost regulator, dual intlet filter/ separator head, new fuel cooler, a reprogram from Dustin at Whipple (spoke to him a few times) and maybe new fuel rails
 

Attachments

  • 0710091321a.jpg
    0710091321a.jpg
    137.7 KB · Views: 16
Excellent job, you should send pic's to procharger to show them how it is done.

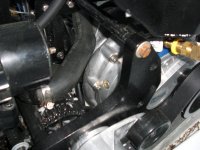
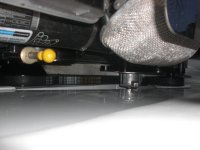
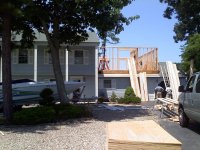
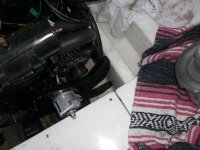
thanks guys, in a week or two i'm taking the boat to get the starboard side motor mount stud welded, I broke it at the last run of the season. The guy that does my welding is an awesome welder/fabricator so he'll be giving my bracket a good look and either add to it or cut a new custom bracket, here's how the mount broke and here's me getting it fixed:smash:
 

Attachments

  • CIMG80577.JPG
    CIMG80577.JPG
    93 KB · Views: 15
  • downsized_0903091841.jpg
    downsized_0903091841.jpg
    51.6 KB · Views: 14
Back
Top